This is a more “from-scratch” and meat-inclusive version of my quicker, spicy southwest veggie soup.
Ingredients
amount
ingredient
50g
black beans, dry
50g
white beans, dry
100g
kidney beans, dry
1 lb
chicken breast
24g
oil
160g
onion, diced
150g
bell pepper, diced
28 oz
tomatoes, diced
28 oz
water
15g
Better Than Bouillon
12 oz
corn, frozen
1 oz
jalapenos
2 T
cumin
1 T
chili powder
1 tsp
salt
to taste
black pepper
½ tsp
garlic powder
½ tsp
MSG
¼-½ cup
cilantro, chopped, fresh or frozen
1
lime, fresh, juice of (optional)
Process
Instant Pot
add all dried beans to Instant Pot and cover with ~1″ of water
pressure: high
time: 15 minutes
release: 10 minute natural
drain beans, set aside
sauté: high
add oil and chicken, sear until chicken is no longer pink; set aside
add onions and bell peppers, cook until translucent
add all other ingredients, including chicken, to pressure cooker
pressure: high
time: 4 minutes
release: 15 minute natural
remove chicken breast and set aside to cool enough to handle
blend soup sporadically with immersion blender until desired consistency reached (optional)
dice chicken into bite-sized pieces, or shred and return to pot
add cilantro and fresh lime juice, mix well and serve immediately
Stovetop
I’ve never bothered to make beans on the stovetop and wouldn’t recommend it to others. If you already have beans (canned, frozen, or just extra lying around, proceed with the below. Otherwise, just submerge dry beans in water and cook them forever.
in heavy-bottom pot, add oil and sear chicken until no longer pink; set aside
add onions and bell peppers, cook until translucent
add the rest of the ingredients, including chicken; simmer until chicken is cooked through and all other components have meshed together
remove chicken and allow to cool enough to handle
blend soup sporadically with immersion blender until desired consistency reached (optional)
dice chicken into bite-sized pieces, or shred, and return to pot
add cilantro and fresh lime juice, mix well and serve immediately
Notes
This soup goes great with:
a dollop of sour cream
corn tortilla strips, chips, or broken up tostada/tortilla shells
shredded cheese of choice
avocado
fresh jalapeno coins
a dash of hot sauce
crusty bread
Picture shows soup made with 3-4 T of heavy cream, and 2 cans of tomato sauce instead of the diced tomatoes, since that’s what I had on hand. I had already copied my before small and uniform, and with no large tomato chunks, I didn’t bother to blend. Extra lime juice and pepper jack cheese added to serve.
See the freezing guide for tips and information on freezer-safe food storage.
cover and chill for at least 1 hour before serving
Notes
The covering and chilling is actual pretty vital to this recipe, although it’s tempting to skip the step. If you eat it right away, the flavors will feel off and disjointed, maybe too sweet or too tart. But once it’s had a chance to meld together in the fridge, everything becomes much more cohesive.
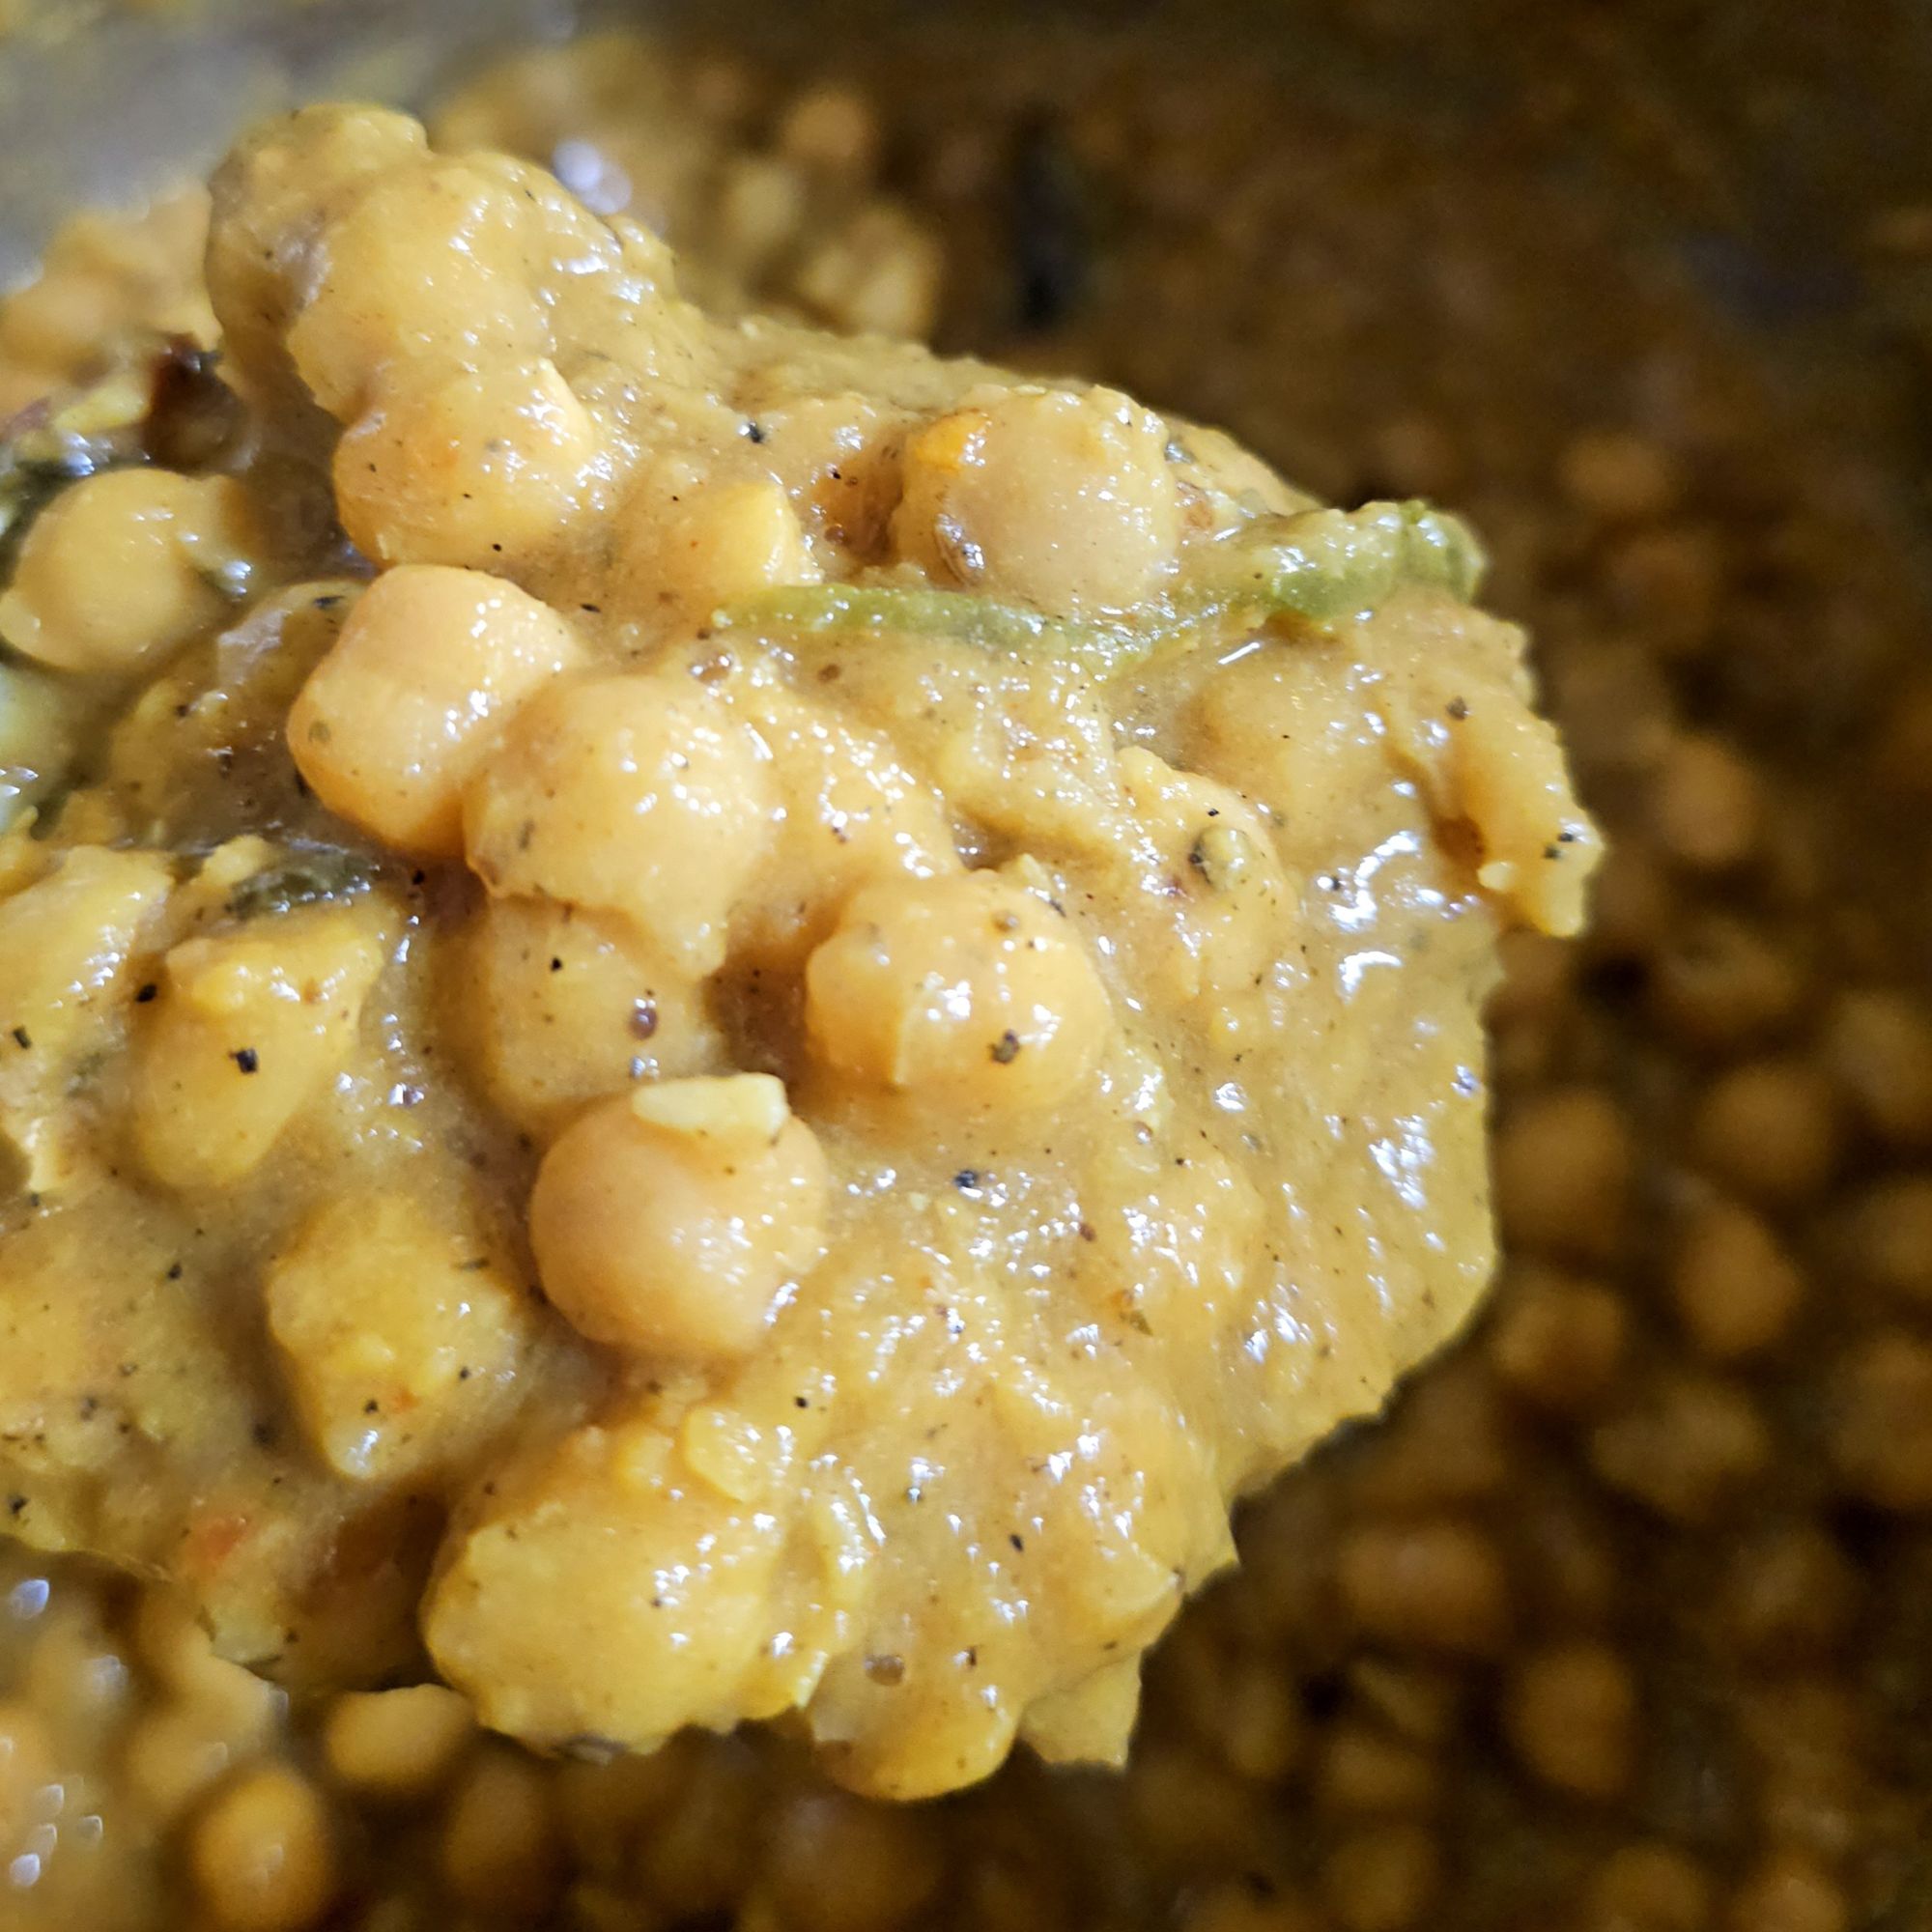
Also known as “chikad chole” or “chikar chole” which translates to “muddled chick peas”.
Don’t be intimidated by the long list of ingredients. If you cook desi food often, you likely already have them all on hand. I’ve broken the process down into its simple, individual components for the sake of clarity.
Because this is a recipe that uses interesting techniques, I highly recommend reading through the whole post before getting started.
Credits
Recipe adapted from Flavour of Desi Food. Watch the video linked to see the process and also if you’re confused on any particulars (like, “how much is 3 pieces of cinnamon?”). I’ve adapted the recipe from her, so there are some small changes, but the video is an excellent resource regardless.
Shoutout to user farzadalirdofficerscci4689 who dropped the written recipe in the comments. You a real one.
ingredients
amount
ingredient
500g
chickpeas, dry
1 tsp
baking soda
1 tsp
salt*
110g
oil
1 T
ginger garlic paste
1 small
onion
1 tsp
salt*
1 tsp
cayenne
1 tsp
chili flakes
1 tsp
turmeric
1 tsp
black pepper
1 small
potato
~½ cup
water
3 pieces
cinnamon
3
black cardamom
1 tsp
cumin powder
1 tsp
coriander powder
1 tsp
chole powder**
1
chicken bouillon cube
1 tsp
amchur powder
115g
yogurt, whole milk (dahi)
3 cups
chickpea cooking liquid (aqafaba)**
1 tsp
dried fenugreek (kasuri methi)
1
jalapeño, thin sliced
to taste
cilantro, fresh
*salt is listed twice, as it’s used in 2 places **see notes
Onion paste
Making the onion paste is easy: just blend 1 small onion into a smooth paste. I used a mini food processor that came with my stick blender, but you could use a stick blender, regular blender, or even a spice grinder.
I used a mix of red and yellow onions, but feel free to use whatever you have on hand.
Thickening paste
Boil the small potato until fork tender. Since this will be blended up, I did not bother to peel the potato (and I like potato peels, anyhow, so why do more work?). I just cut out any suspicious areas or eyes in it and set it to boil. Once done, let cool. You can cut it into a few pieces to help speed up the process.
To the potato, add a ½ cup of cooked chickpeas, and the ~½ cup of water. Blend until a smooth paste forms. I used the same mini food processor from the onion paste.
Naturally, because it uses some of the cooked chickpeas, this thickening paste must be made after the chickpeas are cooked, so it can’t be prepared ahead of time.
Spices
Everything was made easier by portioning out my spices ahead of time since the flavors are layered in different stages. I prepped as many things ahead as I could, particularly the dry ingredients so that I wasn’t worried about measuring or missing something during the cook.
I combine anything that’s going in together in the same bowl, no need for individual ramekins for each spice.
bowl 1
bowl 2
bowl 3
salt
cumin powder
chicken cube
cayenne
coriander powder
amchur powder
chili flakes
chole powder
turmeric
black pepper
I also took out and set aside the cinnamon and black cardamom.
Process
This recipe requires a bit of planning ahead, but does offer some downtime in which to multitask and prep ingredients (see previous section). I’ve listed the processes below with this in mind to help streamline everything.
Overnight soak
Add dry chickpeas and baking soda to a large mixing bowl and fill it with water. Yes, fill it—the chickpeas will expand considerably and drink up most of it. Cover the bowl with a dinner plate / tea towel / aluminum foil (whatever you have on hand) and let soak for 12 hours.
Cooking the chickpeas
After 12 hours, drain the chickpeas and rinse them under cold water. Add them to the Instant Pot along with 1 tsp of salt, then cover with water. There should be enough water in the pot to cover the chickpeas with and an additional 2″ of water on top of that.
pressure: high
time: 14-16 minutes
release: 20 minutes natural release
When done, DO NOT DRAIN!
This is a good place to make the thickening paste using ½ cup of the cooked chickpeas.
If you’re using your IP for the rest of the cook, then transfer the chickpeas with their cooking liquid back to the mixing bowl (you washed it, right?), cover, and set aside. Wash the IP insert and move onto making the base gravy.
Base Gravy
add oil + ginger garlic paste to Instant Pot
sauté: medium
spread paste around evenly and cook gently until fragrant, ~30 seconds
add onion paste and cook, stirring periodically, until it changes color to an even, toasty brown and most of the water has evaporated
sauté: low
add the first round of spices (bowl 1) and sauté for 1 minute; the heat is reduced so that the spices don’t burn
sauté: medium
add the thickening paste and sauté well until everything is nicely incorporated; this may take several minutes
if the potato mixture is quite thick, it may stick to the pan; if this happens, add water as needed (a few tablespoons at a time) and scrape the bottom frequently so nothing burns
add cinnamon and black cardamom, cook for 2-3 minutes
add the next round of spices (bowl 2) and mix thoroughly
crumble up the chicken cube and add it to the gravy along with the amchur powder (bowl 3); mix
Bring It All Together
add cooked chickpeas and yogurt; mix mix mix
add the aquafaba and stir to combine everything; it will be pretty soupy at this point
cook uncovered for ~20 minutes until the salan reduces to your desired consistency
stir regularly and scrape the bottom of the pot to make sure nothing is sticking
as you stir, crush the chickpeas against the sides of the pot to muddle everything together, make it thicker and give it the signature look
Finishing
Add all the fenugreek and half the cilantro + jalapeño slices (reserve the other half for garnish); mix thoroughly and cook for ~3 minutes.
Notes
be generous with the ginger garlic paste; I use a heaping tablespoonful
the original recipe listed “garam masala” but I dislike it a lot, so I substituted with a boxed mix (Shan or other brand) of generic “chole masala”…you could probably get away with using any sort of box mix spice blend here. Or use garam masala if that’s your thing. If you have none of those, skip it.
aquafaba is the sometimes foamy, cloudy liquid leftover from cooking chickpeas, which we’ll hold onto and won’t discard in this recipe; this is NOT the soaking water that the chickpeas sat in overnight (which had baking soda added to it)
I made this entire recipe in my Instant Pot (first cooking the chickpeas, and then the whole dish in it), but you could make it on the stove top just as easily. I do recommend using the IP or another pressure cooker to cook the actual chickpeas themselves because that will take a lot longer any other way. But apart from that, you can proceed with the rest using any pot you prefer.
See the freezing guide for tips and information on freezer-safe food storage.
pour water in pressure cooker, drop in trivet, add eggs
pressure: high
time: 3 minutes
release: quick
soft steamed
take eggs out immediately and immerse in ice water bath
crack, roll, and peel; if you have extremely fresh eggs that are a little stubborn, you can return to the ice bath after peeling some of the bottom so that the water enters between the shell and the egg, making it easier to separate them
Soft steamed eggs have a fully set, but tender white and runny yolk. Be gentle when peeling as the yolk is runny so there isn’t much structure to the egg. Don’t roll aggressively.
Enjoy these eggs all on their own as a decadent snack or in place of poached eggs on top of fancy toasts. They’re much less fiddly than poached eggs, and also use the entire egg without discarding any of the whites. You can also add them to hearty grain bowls or roasted vegetable salads.
Jammy
leave eggs inside the pot with the lid on for 5-6 minutes
remove from pot, dunk into ice bath, crack, peel
Jammy eggs have a fully set white and set yolks, which are still creamy and soft, with a brighter orange color in the centers where they’re not quite as set. These have more structure than soft steamed and don’t have to be handled as carefully.
Enjoy these on their own or in salads and sandwiches.
Fully Cooked
leave eggs inside pot with the lid on for 10 minutes, then dunk into the ice bath and peel
Fully cooked eggs have a fully set white and yolks, with no green ring around the yolk! The green ring is indicative of overcooking and also creates a sulfurous taste/smell. The yolk will be an even yellow color throughout, with no orange.
These are the standard, fully cooked eggs used in various recipes like egg salad, cobb salad, or deviled eggs. Use them in those, eat them alone with some salt and pepper, or drop them into a soupy salan like this simple aloo salan, chana shorba, or koftay. The yolk breaks down and melts into the soup, creating a creamy gravy.
Notes
If you don’t have ice, just use the coldest water that comes out of your tap; you may need to change out the water several times, or just keep your bowl under cold running water to help delay the residual cooking process.
The easiest way to peel them is to crack the bottom, flat part where the little air pocket sits, then gently roll to crack the entire shell.
I’ve set up this recipe so that everyone in my family who likes their eggs at different done-ness can still enjoy it just how they like without any extra fuss. So I’ll have my runny yolks by taking them out first, then leave the rest chilling in the pot for the listed times according to what my other family members prefer.
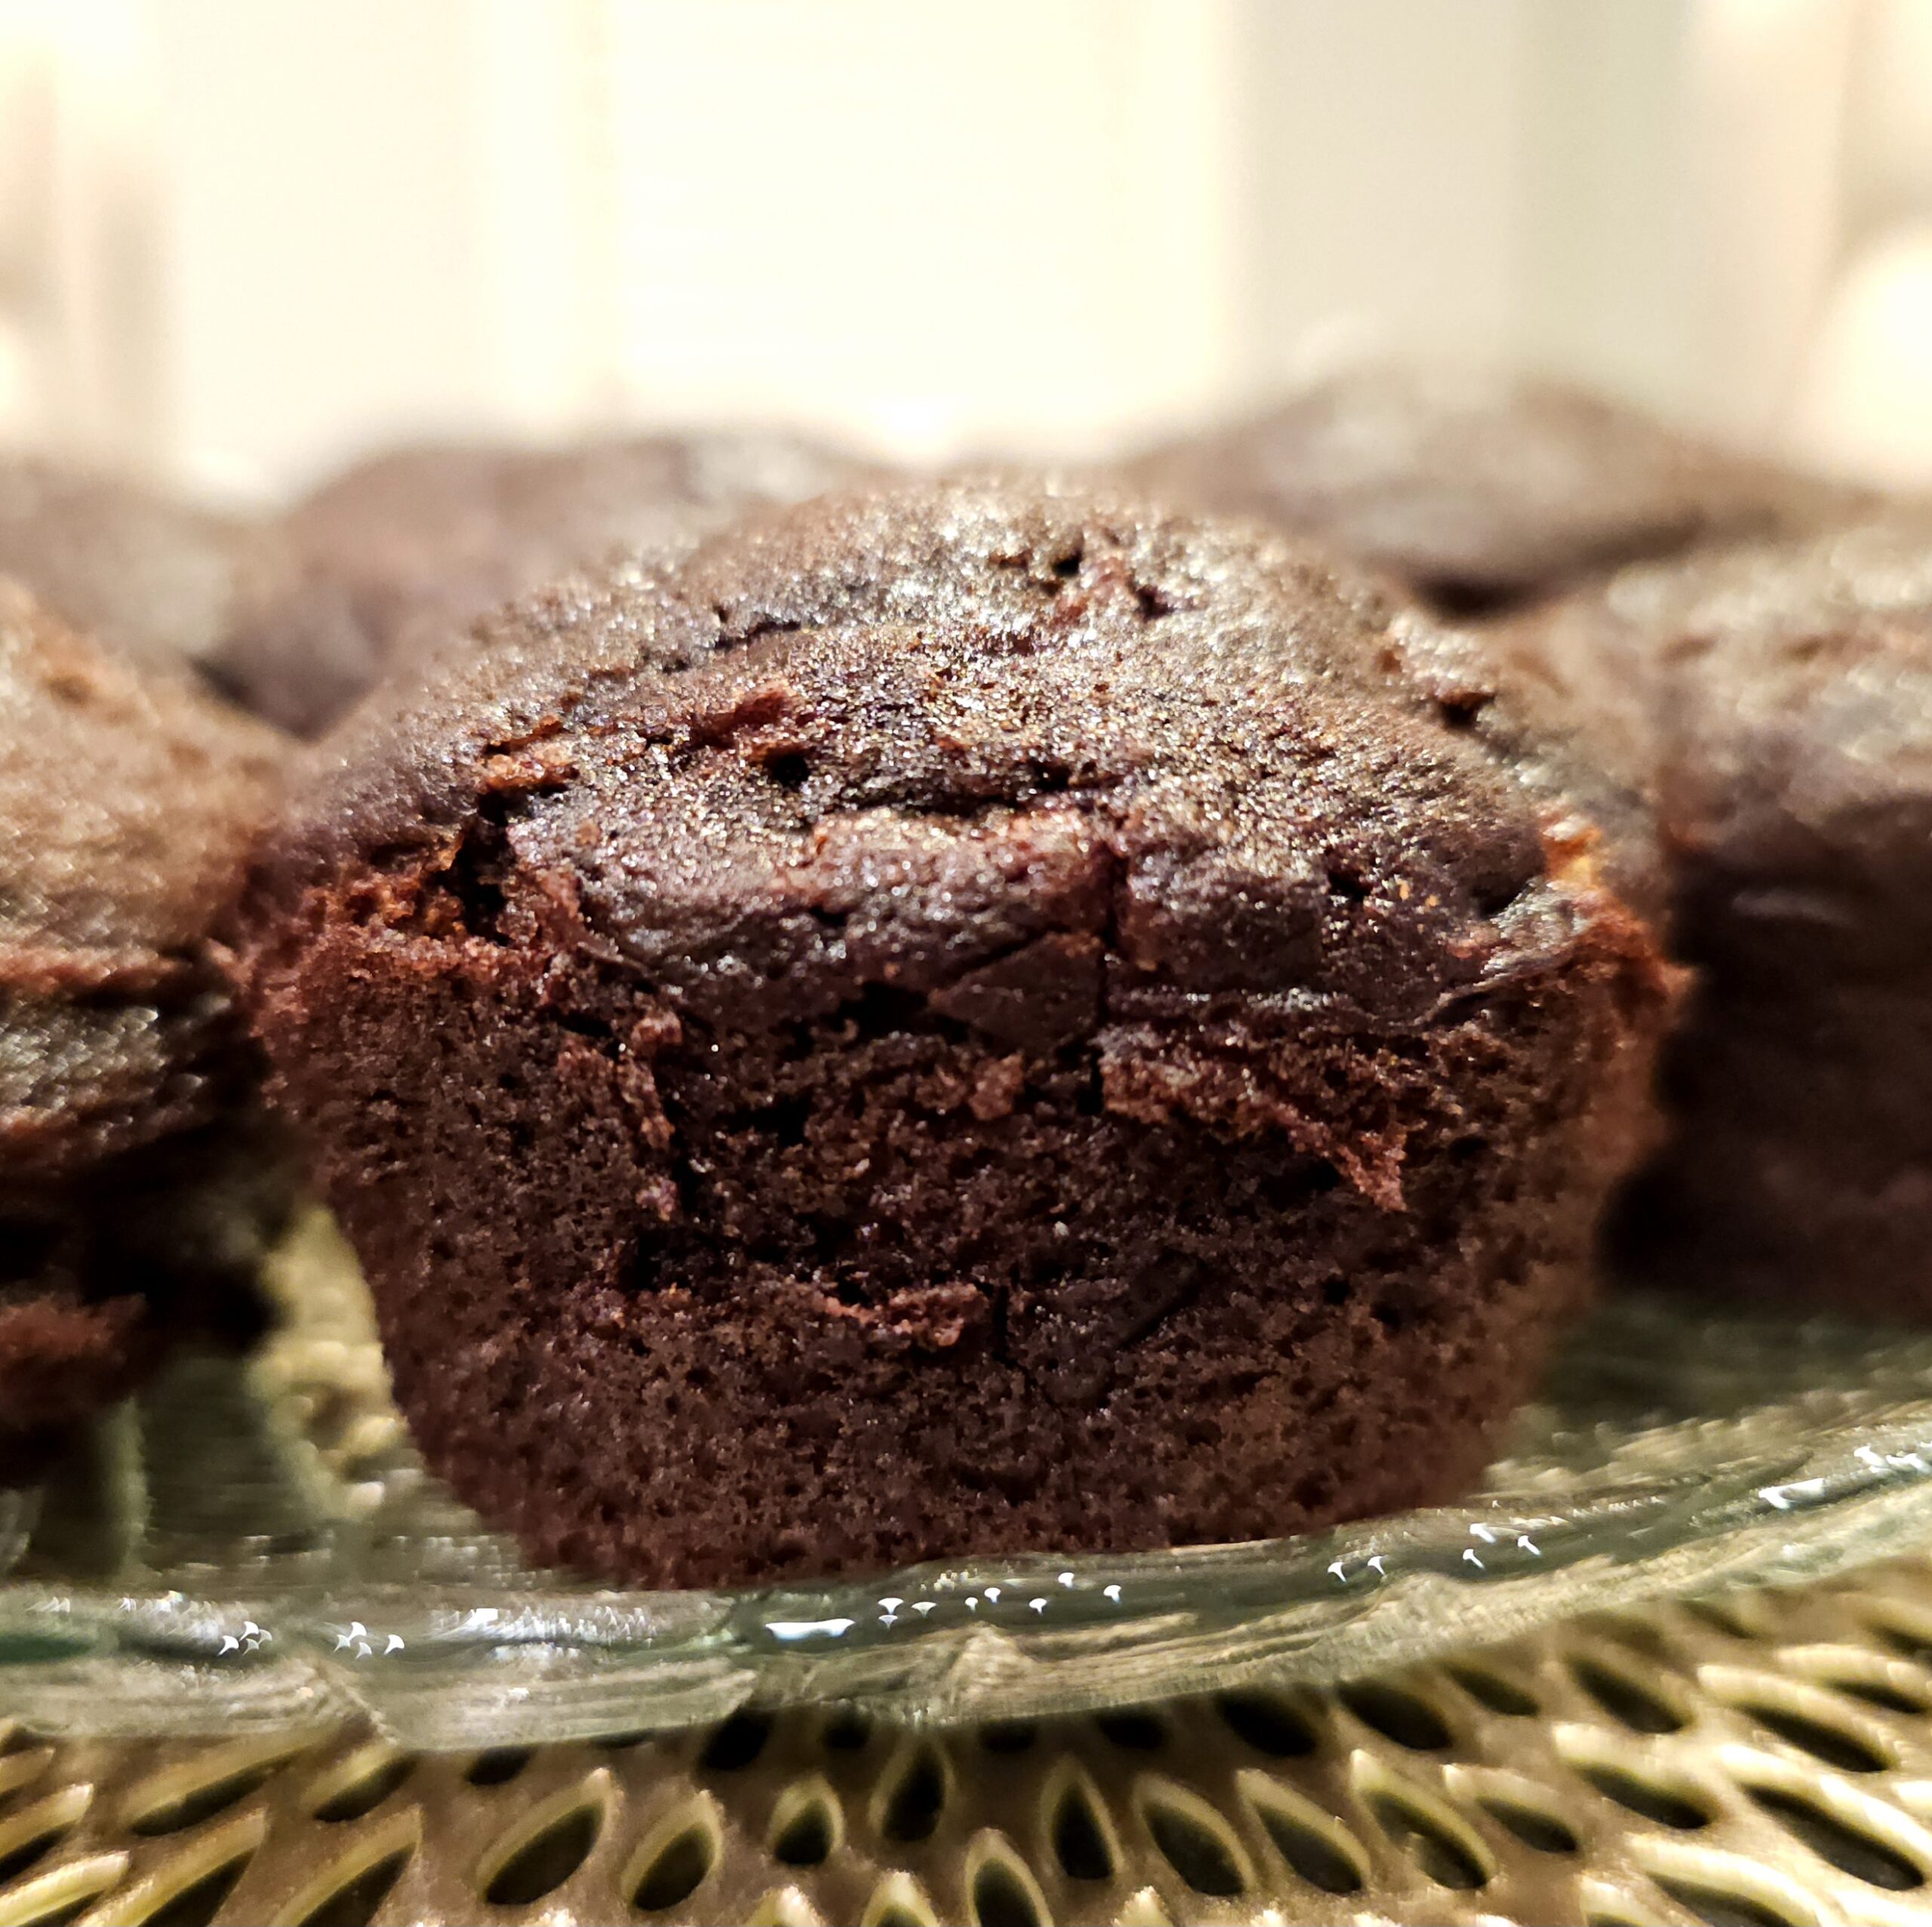
because of the science involved, the cocoa powder can’t be replaced with dutch-processed cocoa powder; read the original recipe post for more details (see Credits section above)
if you do not have applesauce, you can just use oil; you can replace some of the oil in most baked goods with applesauce
espresso powder deepens the chocolate flavor, without giving any coffee flavor in this amount; use it if you have it, skip it if you don’t
if you don’t have molasses, use 100g of regular sugar and 150g of brown sugar
other
all ingredients should be at room temp; if you’re like me, just heat a cup of water in the microwave to generate heat and steam, then put the sour cream and eggs in the TURNED OFF microwave to warm up before you start
oil the tray really well as they will stick to dry spots easily
See the freezing guide for tips and information on freezer-safe food storage.
heat tortilla according to preference (see notes below)
if using cheese, lay cheese on top of hot tortilla and add hot chicken tender on top so the cheese melts easily
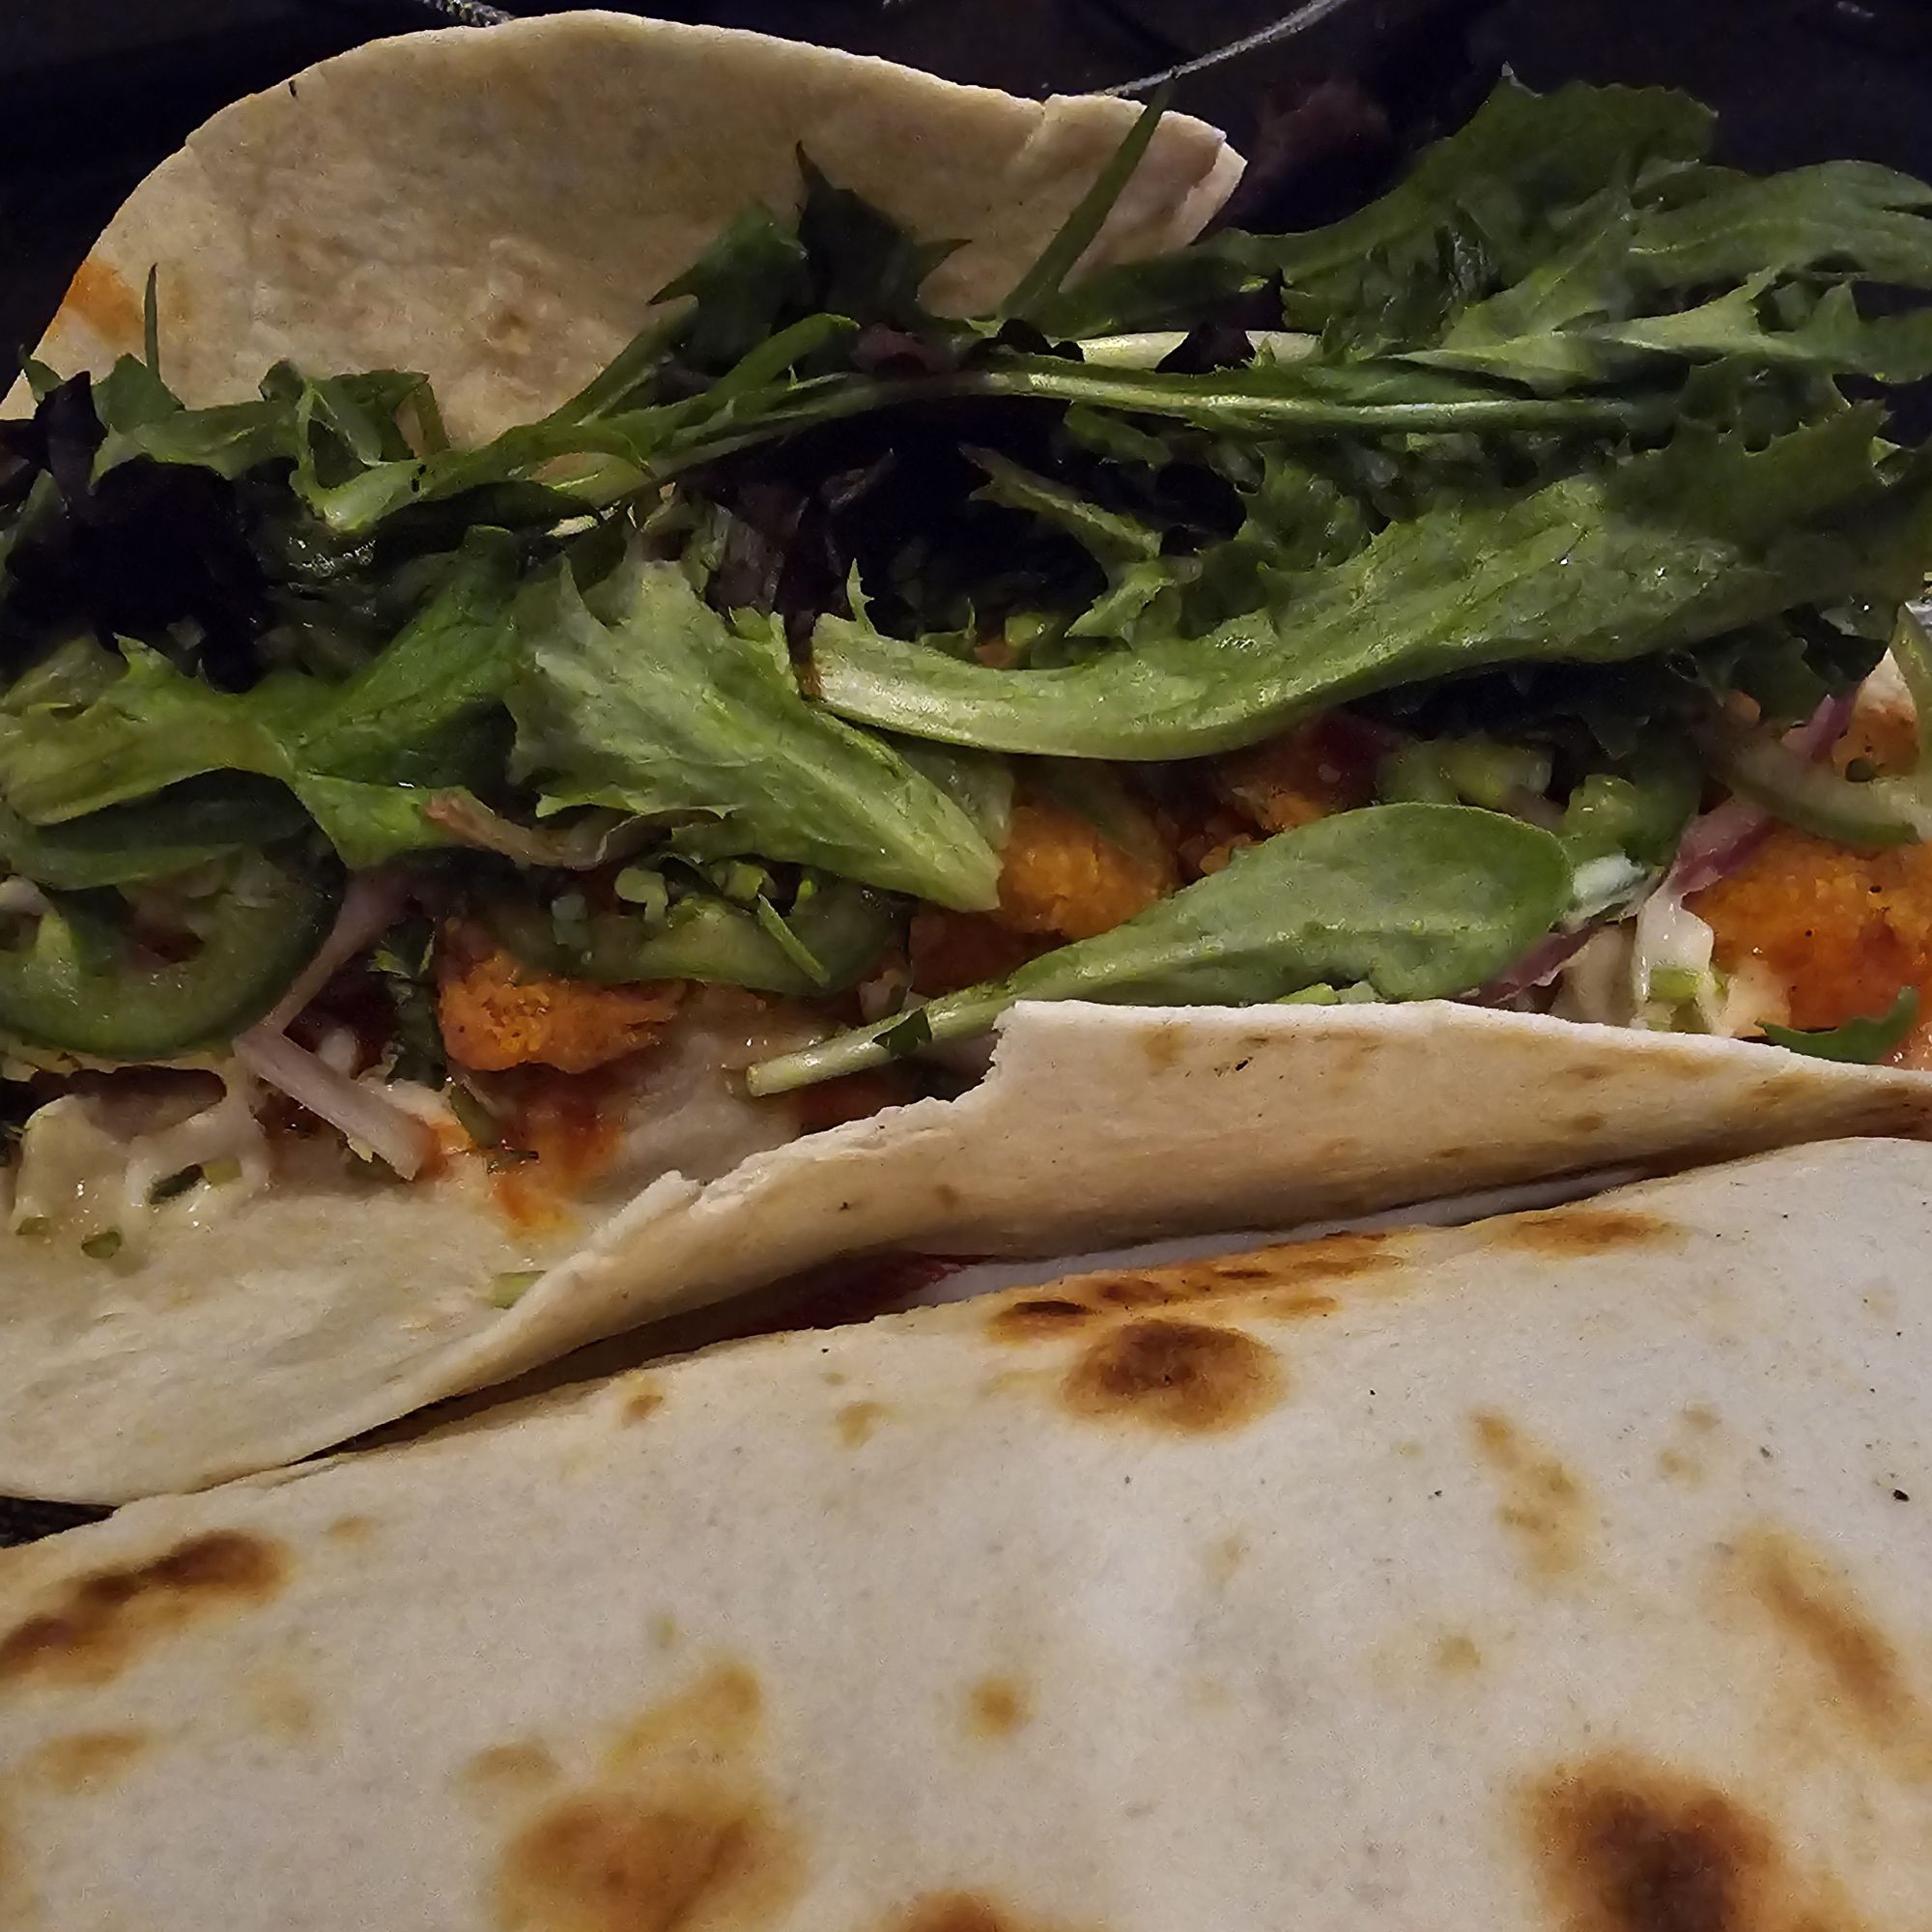
layer the rest of the ingredients on top, ending with the lettuce so that you can more easily hold things down to roll without getting your hands dirty
roll up tortilla; it’s not necessary for complete overlap if you’re careful with holding it properly while eating
notes
naturally, all amounts are to-taste so do and use whatever you like
tortilla can be heated any way you prefer:
stovetop: on a griddle, tawa, comal, or dry frying pan, turning to get nice brown spots and taking it off the heat once desired doneness is reached; do not heat too long or it will become crunchy and not foldable
microwave: lay tortilla on microwave -safe plate and cover with a damp paper towel, heat until just warmed through; this will yield a soft, pliable tortilla that’s not crunchy at all
airfryer / toaster oven / oven: heat for a few minutes until warmed through; avoid getting brown spots as it will turn into a giant tortilla chip pretty quickly, especially in a toaster oven or air fryer which works faster than a standard oven
any chicken tender will work, I use a spicy breaded variety and pop it in the airfryer for 20-25 minutes, flipping halfway through
I use Frank’s hot sauce and find the simplicity of it plays nicely with both the mayo and pickles
for the greens, use whatever you have on hand: iceberg, spring mix, spinach, arugula, celery tops, romaine, etc.
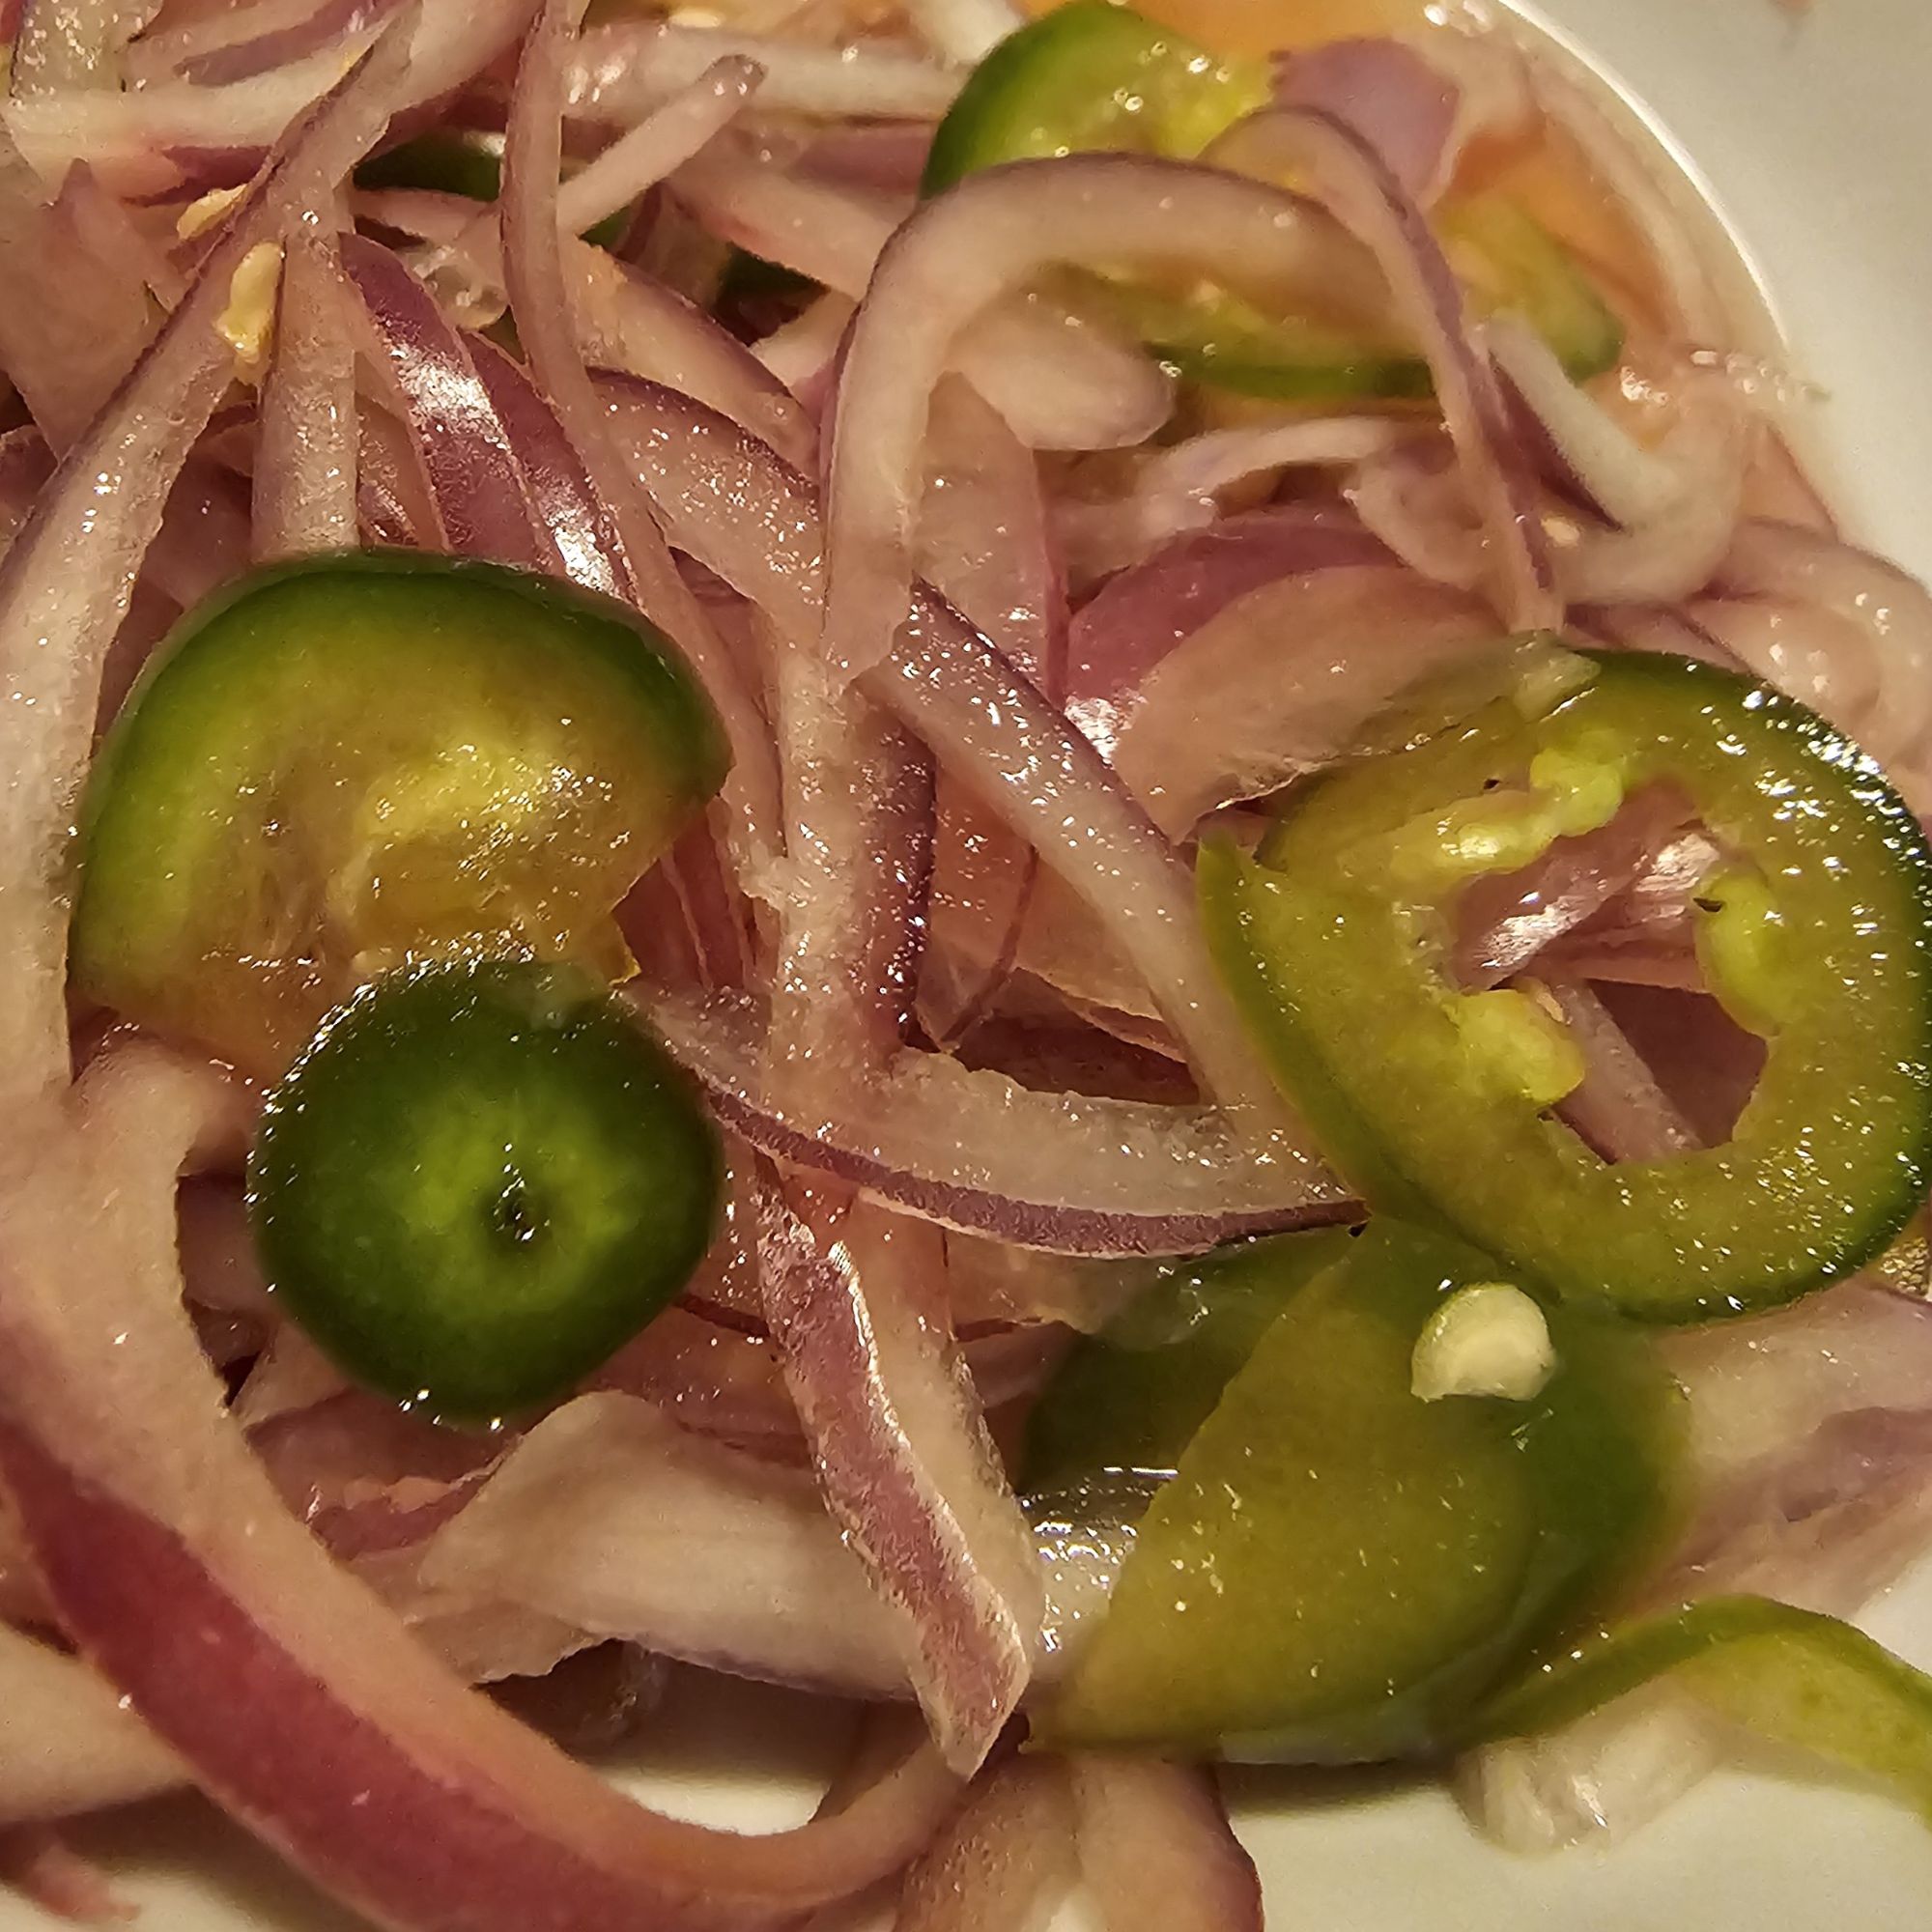
slice the onion very thinly, lengthwise (from pole to pole)
slice jalapeño very thinly into coins
add salt to taste—not enough to make it salty, just enough to play up the other flavors
add lemon juice and massage into the vegetables so that all the onions break up from their nested sections and the lemon juice nicely coats everything
rest ~10 minutes until the vegetables lose some of their raw bite
Notes
can use white onions, but the flavor is better with red, as they tend to be sweeter and better for consuming raw
I cut my vegetables very thinly; you could make thicker slices if that’s what you prefer and those may hold up better to storing (untested)
other acids can be used as well, such as vinegars, or lime juice; I find the lemon juice adds the best burst of bright citrus flavor and tang
These pickles are best made and enjoyed fresh, but can be stored covered in an airtight container in the fridge for several days. They will lose some of their snap as the acids continue to work on the vegetables, but will still be tasty.
rough quarter potatoes, add to pressure cooker along with garlic
add water just over covered; salt generously
Pressure: high
Time: 8 minutes
Release: quick
drain water, switch to low saute and insure all water has evaporated, if needed
add all ingredients, mash to desired consistency
notes
I leave the skin on the potatoes, they add a lovely flavor and texture (plus it’s easier, so why wouldn’t you?); I just cut out any egregious potato eyes or suspicious bits and scrub the under water
I often forget to salt the water upfront, it’s not a big deal.
I use jarred, pre-minced garlic for convenience and most of it drains out with the water. You can add more during the mashing stage if you like. If using whole cloves of fresh garlic, the garlic flavor will be much more intense since it will stay in the final dish and get mashed up with the potatoes
all measurements are essentially to taste, I go very liberal with the fresh herbs and black pepper
it takes more salt than you think
mixing too enthusiastically makes gluey potatoes so try not to overmix
Herbs
You can switch up the herbs used to whatever you have on hand. I’ve tried a variety of combinations including:
fresh parsley + dill (as written)
fresh dill only
dried basil + dried parsley (the basil was very good, and I’m interested in trying fresh)
If you have leftover herbs, you can portion them out and mix them into the 60g of heavy cream and freeze them. Then, the next time you make these, just drop the whole block of heavy cream + herbs into the potatoes in step 4.
See the freezing guide for tips and information on freezer-safe food storage.
add all ingredients under “in the pressure cooker” to pressure cooker
Pressure: High
Time: 5 minutes
Release: 5 minutes natural, then quick release
add milk, heavy cream, and both mustards, mix thoroughly
add handfuls of cheese, stirring in between until melted, until all cheese is done
notes
any medium size pasta shape will work fine; my favorite is cavatappi
any combination of cheeses can be used, but classic mac and cheese flavor relies on a cheddar-forward profile, the sharper the better (or per preference)
can replace the milk and heavy cream with 1 cup of milk instead (tested)
cheese 2
The original recipe used mozzarella for all 120g of cheese 2, but that was a bit “meh.” This slot is a good place to experiment. The picture below used half Jarlsberg and half shredded Mexican blend. The Jarlsberg adds a really nutty flavor and amazing cheese pull. Also makes a great grilled cheese.
See the freezing guide for tips and information on freezer-safe food storage.